Email Notifications
How to track prospect interaction with your emails
Email Notifications inform you when prospects engage with your emails. Gain real-time insights when your prospects open or forward emails, click links or download attachments. Gage the reception and interest of your proposition before you make a call.
This article discusses how Playbooks email notifications work and how you can use them.
How Email Notifications Work
Playbooks tracks your emails by adding an invisible pixel to an email message. Upon opening an email message, your prospect automatically downloads the invisible pixel, which triggers an email open notification to alert you of your prospect’s engagement. Email Notifications are stored in Playbooks for a minimum of six days. There is no upper limit on the number of Email Notifications presented at any one time.
Viewing Email Notifications
When you receive email notifications, the Bell button in your Info Bar will display a count of new notifications in a red circle. This count is reset each time you view your notifications.
To View Email Notifications
- Open the Microsoft Outlook Application.
- Click the Notifications button in the Home tab ribbon.
NOTE: The Playbooks Outlook Add-in must be installed to see the Notifications button. Click here to learn more.
To View Email Notifications
- Open Playbooks.
- Click the Bell button.
To Receive Notifications in Email
- Open Playbooks.
- Click the menu button (XANT logo).
- Click Settings.
- Click Email.
- Click the Email Tracking Notification switch.
To View Notifications Sent to Email
- Log in to your email.
- Click the email notification email.
- Review the email content for notification information.
To Enable Desktop Notifications
- Open Playbooks.
- Click the menu button (XANT logo).
- Click Settings.
- Click Preferences.
- Click the Desktop Notifications switch on.
- Click Allow in the Show Notifications pop-up window.
If you have enabled notifications but don’t see them, you may need to enable notifications through Chrome or through Windows.
To Enable Notifications Though Chrome
- Open Chrome.
- Click the vertical ellipses in the top right corner.
- Click Settings.
- Find the Privacy and security section.
- Click Site Settings.
- Click Notifications.
- Allow notifications from “app.insidesales-playbooks.com:443”.
NOTE: You may need to turn on the Email Tracking Notification setting and Allow Playbooks settings before this will be available. Perform the Enable Desktop Notifications Though Playbooks steps to allow this feature. - Keep defaults for all notifications.
To Enable Windows Notifications
- Click Start.
- Open Settings.
- Click System.
- Go to Notification & Actions.
- Turn On Get notification from apps and other senders.
- Click Focus assist settings.
- Select Priority Only.
- Click Customize your priority list.
- Navigate to Apps.
- Click Add an app.
- Select Google Chrome.
In addition to viewing your alerts in Playbooks, you can opt to receive email notifications for each alert. This is a great idea if you spend more time in your email Inbox than Playbooks.
If you want to receive these emails every time a prospect interacts with your emails, enable the setting by going to the Playbooks menu, Settings, Email, then enable ‘Email tracking Notifications’.
Types of Email Notifications
Playbooks provides you with more than just email open notifications. It gives you additional insight about how your message is being received. The following list describes the 5 types of email notifications Playbooks sends you. While the Bell icon indicates how many total notifications you have, the number on each individual notification indicates how many times that action happened.
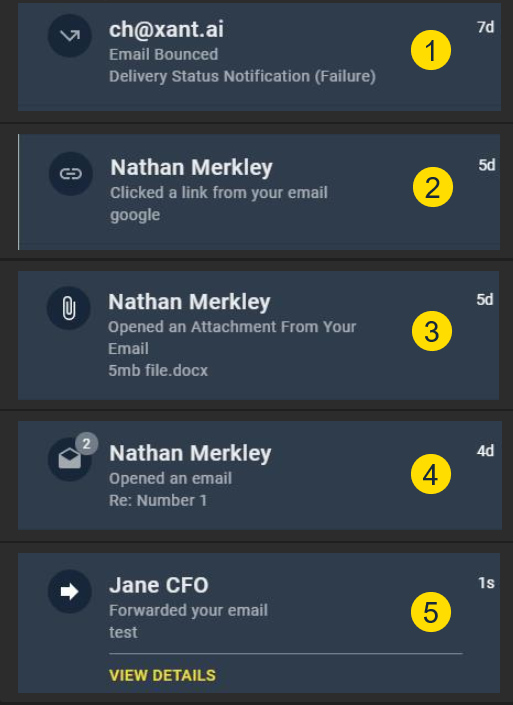
- Email Bounced – Your email was not delivered. This indicates a bad email address or other email system failure.
- Link Clicked – A prospect clicked on one of the hyperlinks included in your email message.
- Attachment Downloaded – A prospect downloaded at least one attachment sent in your email message.
- Email Opened – A prospect opened your email message.
- Email Forwarded – A prospect forwarded your email message to another individual.
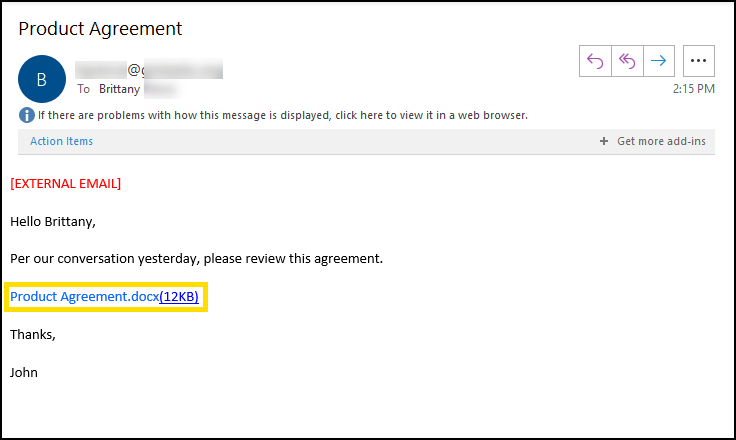
Tracking Attachments
Playbooks give you the option to track the attachments you send to prospects. Tracked Attachments are hosted files that are inserted in an email as a public facing link. This creates a unique download ID for each Tracked Attachment when the recipient clicks the attachment. Clicking the attachment triggers a notification that alerts Playbooks it has detected activity, so you can react quickly. If your next step in your sales motion is dependent on a prospect reviewing an agreement, you can utilize email notifications to make contact when your proposition is fresh in their mind.
To Track an Attachment
- Open the Microsoft Outlook Application.
- Click New Email.
- Place your cursor where you want to insert the Tracked Attachment.
- In the new email window, click Templates.
- Click the Add Attachment button.

To Track an Attachment
- Open the Gmail web application.
- Compose a new message.
- Place your cursor where you want to insert the Tracked Attachment.
- Click the Playbooks icon.
- Click INSERT TRACKED ATTACHMENT.

To Track an Attachment
- Open Playbooks.
- Open any email step, ad hoc email, or email template.
- Place your cursor where you want to insert the Tracked Attachment.
- Click the Attach File button.
- Click Add Tracked Attachment.
Disabling Email Notifications
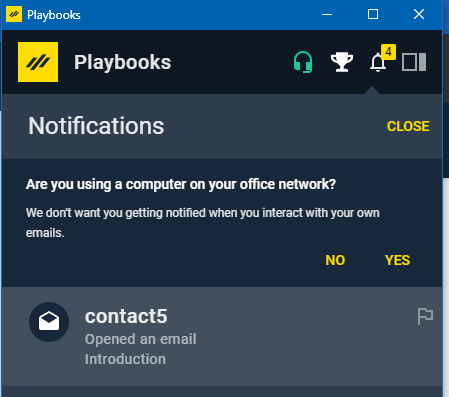
Disabling email notifications stops Playbooks from notifying you when you interact with emails you have sent. To do this, add your computers and other devices to the Do Not Track list within your Playbooks settings. This feature is only available for O365.

To Disable Email Notifications
- Open Playbooks.
- Click the menu button (XANT logo).
- Click Settings.
- Click Notifications.
- Click Add Computer.
- Open the confirmation in your email inbox.

Validating Email Forwards
When a prospect opens one of your email messages, Playbooks relates the recipient to the computer they used and saves this information. Since the combination of recipient email address and computer is unique, Playbooks is able to differentiate between your prospect and new destinations.
If you see the exact same notification more than seven times, it is likely that your email message is being forwarded to new combinations of recipient email addresses and computers that Playbooks has not yet saved.
Flagging Invalid Email Notifications
There are sometimes instances of email notifications being triggered incorrectly. For instance, certain email filters or virus protections within the client’s email may scan all the links within the email to verify their safety. The scan tricks Playbooks into thinking the recipient clicked each link resulting it multiple invalid email notifications. If a notification does not look correct, flag the email to improve your email notification experience. Over time, Playbooks will learn your preferences and provide you with optimal alerts.
To Flag an Invalid Email Notifications
- Open the Microsoft Outlook Application.
- Click the Notifications button in the Playbooks for Outlook section of the ribbon.
- Hover over questionable notification.
- Click on the Flag.
- Enter details.
- Click SUBMIT.
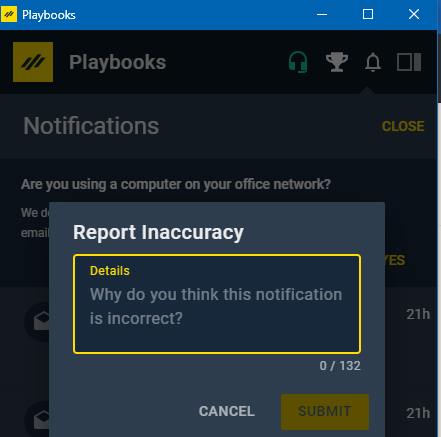
To Flag an Invalid Email Notification
- Open Playbooks.
- Click the Bell button.
- Hover over a questionable notification.
- Click on the flag.
- Enter details.
- Click SUBMIT.
