Provision a Playbooks Account for Dynamics
Prerequisites and steps to provisions a Playbooks account for Dynamics
The process to provision a Playbooks account and connect it to your CRM requires a live meeting with a XANT team member. The following instructions outline what you can do to prepare for this meeting to make setup a breeze.
Preparing for the Provisioning Meeting
Prepare for your provisioning meeting by gathering the required information for each user. Having this information ready before attending the provisioning meeting is crucial to ensuring the set-up process goes smoothly.
Necessary Team Members
During the provisioning and setup process the following Dynamics/O365 users are required.
Required Dynamics/O365 Users
- Playbooks Administrator (The user who will be the primary owner to control the settings of the XANT platform)
- Office365 Global Administrator
- Non-Interactive User (Integration / System User)
For some XANT customers, one individual knows all the login credentials and can control the actions for each of these users. For other customers, each of these users are controlled by a different team member. If this is the case, all three team members need to attend the provisioning meeting with the information outlined in the sections below for each user.
Playbooks Administrator
This user will be the first user to login to the Playbooks account via the Playbooks Manager app. When the account is provisioned, an email will be sent to this user’s email address which kicks-off the “Playbooks Manger One Time Setup.” The Playbooks Administrator can be someone that would assist managers in adding users and teams, creating Plays and email templates, and staying on top of other operations like managing call recording exceptions. Think of this user as “Sales Operations”.
Before the provisioning meeting, gather the Playbooks Administrator’s email address and CRM UID. This email address needs to be an actual email address where email can be delivered. To use Playbooks, each user must be on the same email domain as the Playbooks Admin.
How to Correctly Identify the Dynamics Email Address
- Click Sales drop-down menu.
- Click Settings.
- Select Security.
- Click Users.
- Click user’s name.
- Find email address under Primary Email.
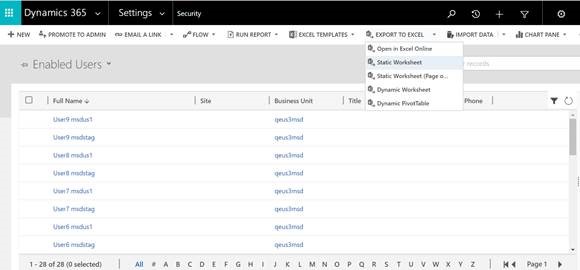
To Locate the Playbooks Admin CRM UID
- Navigate in Dynamics as follows: Dynamics > Settings > Security > Users.
- Click EXPORT TO EXCEL drop-down menu.
- Select Static Worksheet.
- Open the excel spreadsheet with the exported user data.
- Enable Editing on the excel spreadsheet. You’ll notice that the furthermost left column is column D. This is because columns A, B, and C are hidden by default in the export.
- Unhide Column A in the spreadsheet.
- The 20 character CRM UID appears in Column A.
Once you have completed the steps to obtain your UID, deliver it to the XANT Representative helping you provision your Playbooks account.
Example: UID = F8C4D87F-BC88-44C7-98E5-F04EE2B38080
Office365 Global Administrator
A user with Office365 Global Admin rights is required to authorize the connection between XANT and your CRM. After the Playbooks Administrator’s initial login, the XANT UI prompts the Office365 Global Admin to authorize Playbooks to connect to Dynamics by entering their credentials. The Playbooks Administrator and the Office365 Global Administrator may be the same person making the steps above simple to complete. If these users are not the same person, this authorization step can be completed by using one of the following methods.
Ways to Complete the Authorization Step
- Request the Office365 Global Administrator remote login to the Playbooks Administrator’s workstation and enter their credentials.
- The Playbooks Administrator can set up a generic Playbooks password that can be shared with the Office365 Global Administrator, then changed after authorization is completed.
Integration User / Non-Interactive User
The Integration User or Non-Integration User serves as the API connect point between Playbooks and the CRM and was created in your CRM during step two of this setup process. The permission level of this user allows Playbooks to sync tasks and update Playbooks fields on the Lead, phone, email, and task entity records. Before the provisioning meeting, gather these Integration User / Non-Interactive User details.
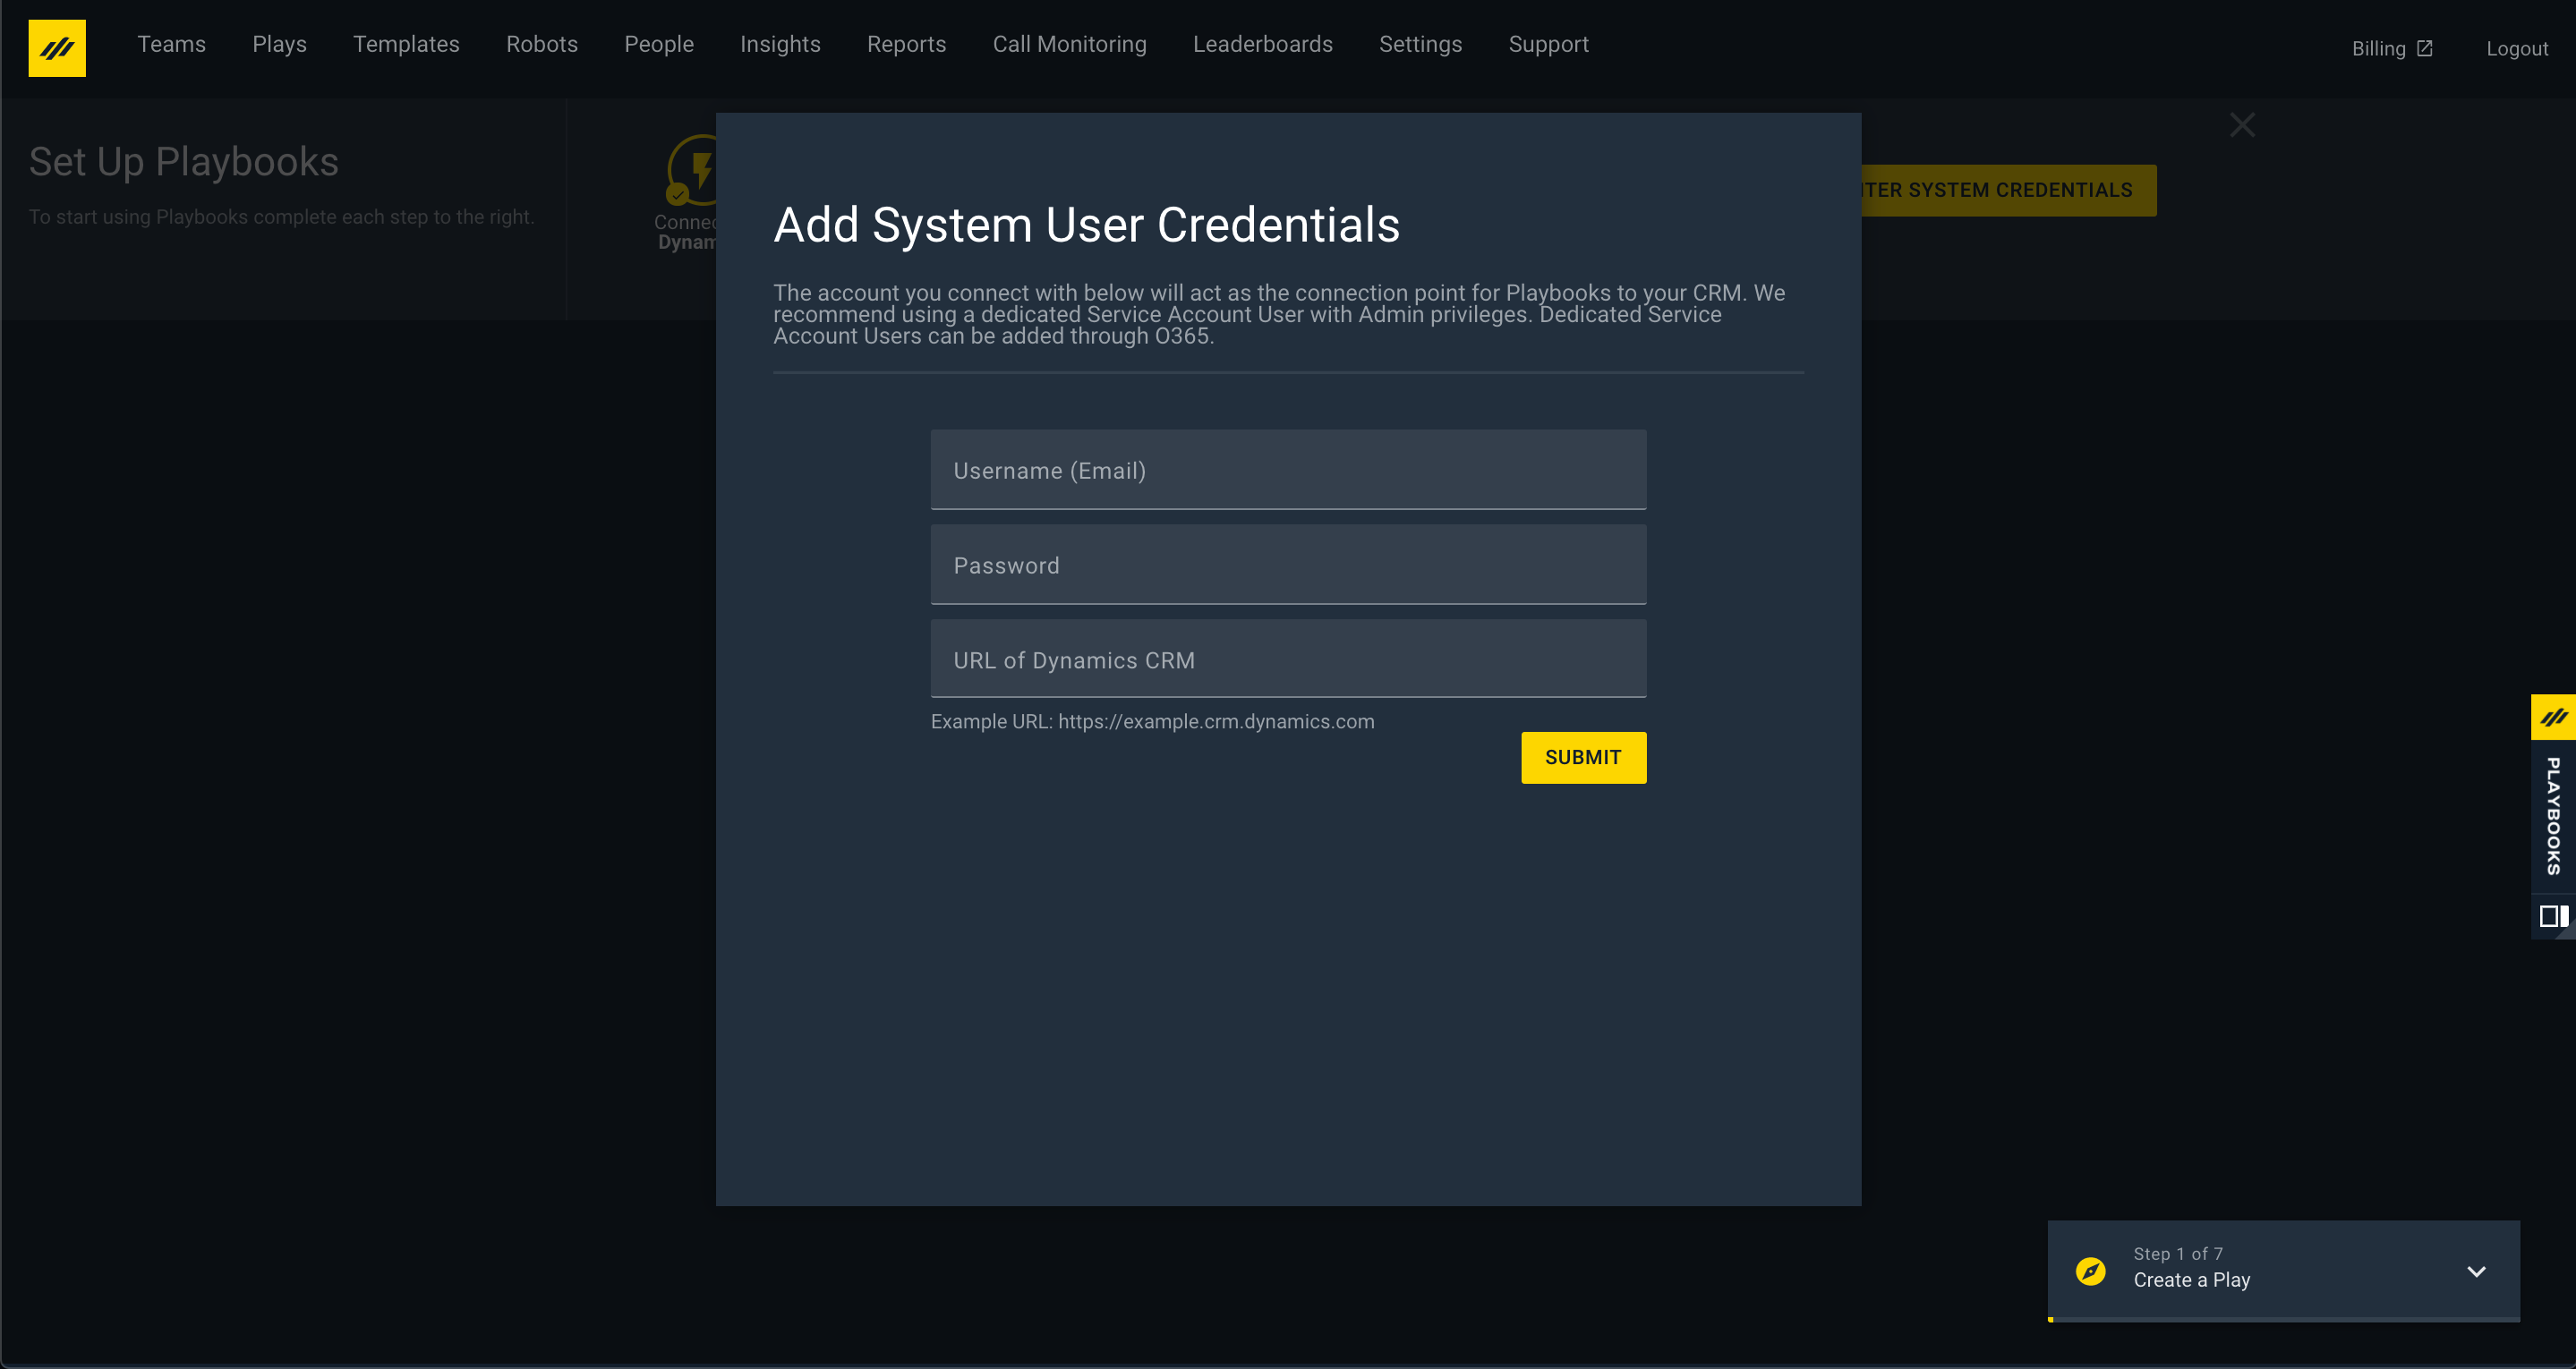
Required Integration User / Non-Interactive User Details
- Username and password
- System user’s email address (as saved in the email field on the user’s record)
- URL of Dynamics CRM: Navigate to a browser tab with the Dynamics CRM open, copy the URL, then paste it into this field. The Manager App will automatically truncate the URL to the format: https://[CRMorg].crm.dynamics.com
After submitting the above information, the Playbooks Admin will receive a Success message. With the XANT Integration User saved on the Playbooks System User page, the two systems will be able to sync and read data bidirectionally.
Attend the Provisioning Meeting
With the team members and information for each required user, you are prepared for the provisioning meeting to create your Playbooks instance and connect it to your CRM. Coordinate with your Technical Consultant at XANT to schedule that meeting, making sure you have each required party from your team.
During the Provisioning Meeting, you’ll be asked to complete some steps to authorize your account. Below is a brief description of these steps.
To Authorize Playbooks to Connect with Dynamics
- Open the Playbooks Manager App.
- Log in with the administrator email address.
- Use the Setup Ribbon to connect with Dynamics.

- Enter Office 365 Administrator password and Sign in. (Playbooks does not see or save user credentials.)
Note: The credentials entered above must be for an Office365 Global Administrator. You may need to select the option to “Switch Accounts” in order to enter different credentials. - Click Accept.

Immediately following authorization, the Playbooks Administrator is presented with a window to enter the Dynamics credentials for the Non-Interactive User (see section above for a list of the required information).
After submitting the above information, the Playbooks Admin will receive a Success message.
With the Dynamics non-interactive user saved on the Playbooks System User page, the two systems will be able to sync and read data bidirectionally.
Welcome Email
Once your Playbooks account is provisioned, the Integration User or Playbooks admin will receive a welcome email from no-reply@xant.ai. Check the junk folder in case you don’t see it in your inbox.
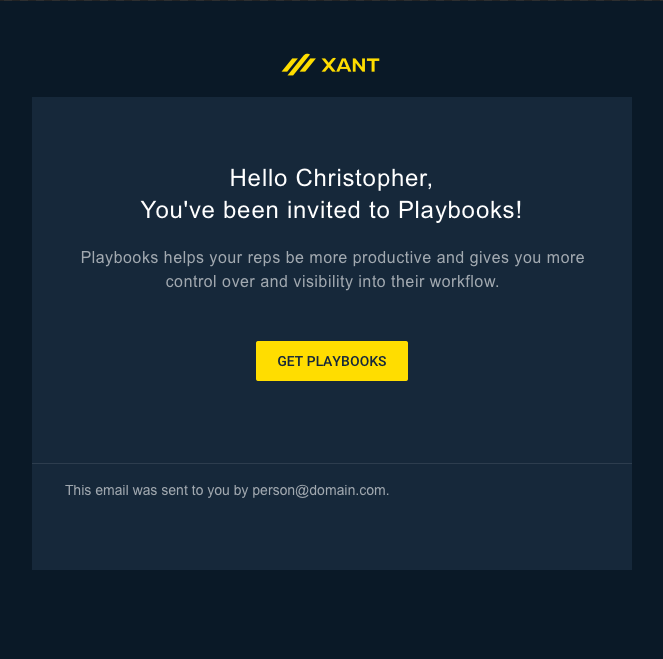
Click on the yellow button in your Welcome email and you will either be prompted to create a Password following the password requirements or be automatically directed to the next step to install the Unmanaged Package.
Password Requirements
- 6+ Characters
- 1 Uppercase
- 1 Lowercase
- 1 Number
