Setting Up Click-to-Call for Lightning Experience
Quick guide on how to set up Click-to-Call in Lightning
Overview
The InsideSales.com Click-to-Call panel does have the functionality to work on the Salesforce Lightning Experience. Below are the steps that you will need to take within Salesforce to bring this function to your users.
Enable the Lightning Experience for Your Salesforce Organization

To Enable the Lightning Experience in Salesforce
- Setup
- Lightning Experience
- Scroll down to the bottom and find the Lightning Experience option.
- Switch this to Enabled if not done already
Make sure you are in the Lightning Experience for the rest of this setup process. You can flip to Lightning by clicking on your username in the top right and then click on the ‘Switch to Lightning Experience’ option.

Enable OpenCTI for Lightning

You will need to have OpenCTI for Lightning enabled for the panel to work.
- Navigate to Setup
- Apps
- App Manger
Click the down arrow on the right to edit the app the app you are on. (These apps control how records are viewed and presented to users while navigating through the interface. Typically customers prefer to use the Sales App marked as Lightning but can vary depending on what interface in Salesforce you are using. Adding the Click-to-Call can be accomplished by adding a new Lightning App as well.)
Add the OpenCTI Softphone Item to the Utility Bar
Go to the Utility Bar page for that App and add the OpenCTI Softphone item.

Update Your Call Center
You will now need to change your call center to the InsideSales.com Click to Call Lightning Call Center.
To Update Your Call Center
- Go to Setup
- Manage Users
- Users
- Click ‘Edit’ next to
- In the Call Center field, select the InsideSales.com | Click-to-Call Lightning call center
- Have reps log out and log back in again
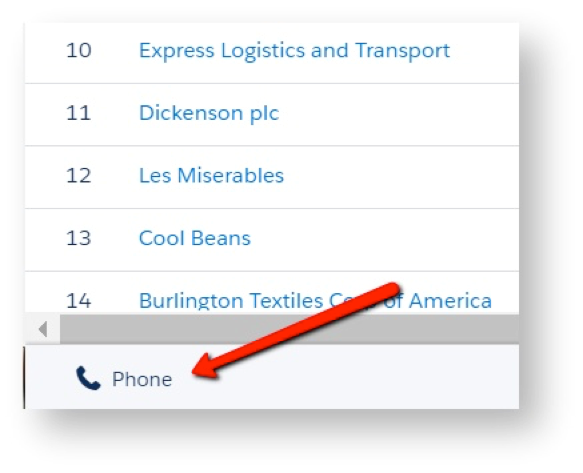
If you have set it up correctly, there will be a Phone button in the bottom left corner of the page that you can click to access the Click-to-Call panel.
Frequently Asked Questions
Q: Are you able to move the location of the panel to the right side of the window?
A: Salesforce has limited the location of the call center to the utility bar on the bottom.
Q: Are you able to adjust the size of the panel?
A: The panel has been coded to the max size allowed.
